A version of this column first ran in the Roane County (WV) Reporter and Times Record as part of a gardening series. Support local journalism! Subscribe to your local newspaper. This is one of a series of blogs for new gardeners. Start reading the whole series here: Part 1.
Starting a few weeks ago, you may have been buying or starting seedlings, and setting them out in your garden.
There are various useful media for starting seedlings in; what matters is that they have a balance of free-draining materials (I use sand) and water-retention elements (I use peat moss) so they don’t either remain soggy or need watering more than daily. Allowing too much dampness and not enough air and sunshine, once the seedlings have come up, can lead to damping-off, a disease that only attacks seedlings in airless situations. What happens is that they wilt and you see white fuzz around them. I’ve seen it usually only on newly germinating seeds just emerging from the soil. I put my planted pots in plastic bags for germination so I don’t have to keep dampening them, but check them daily because once they emerge they need air and light. This, by the way, is a downside of planting more than one variety in one pot; sometimes one comes up much sooner than the other and if you put the pot on a sunny windowsill it may reduce germination in the slowpoke.
The other thing about your initial soil mix is that it should be sterile, so you know those things coming up are what you planted, not weeds. It’s remarkable how much seedlings can grow just on the nutrition in the seed, and water and light. But once they have true leaves (not the pair of seed leaves most plants build first), it’s time to prick them out, to place them in a richer soil in a more permanent pot. I use the kind that are made of black plastic and mostly have either four or six cells, one seedling to a cell. I use a pen or pencil to poke a hole in the new soil for each seedling, and a narrow spoon to lift out individual or groups of little seedlings. You need to handle these by the leaves, not the stem, carefully. They should be watered well after this pricking out, and kept in shade for at least one day.
A few weeks later, if all has gone well, the plants have grown nicely and are itching to get out of the confining pot. They may be rootbound, as may store-bought ones. In that case you may want to gently pull apart the spiraling roots to splay them out in the hole in which you set them in the garden. I do this only on the bottom—I don’t want to manhandle the roots too much (womanhandle—whatever).
In my case, my plants also get impatient to be set out because as spring advances, my greenhouse gets less and less light (because the sun crosses at a higher angle, blocked by the roof). If you are using artificial light this may not be a concern, but you still need to get the plants out in the real world as soon as they’re ready (and, in many cases, as soon as you believe it won’t frost). First, you should harden them off by exposing them to strong sunlight, breezes and variable temperatures—a little at first, then more each day for perhaps a week. Coddling time is over, seedlings!
You want to pick a cloudy day to actually set them out, if possible—more than one cloudy day is even better. Transplanting shocks the roots and they do better if they aren’t trying to photosynthesize. This is why bigger plants like bushes and trees are often pruned when transplanted—because they lose roots, they need fewer leaves for the roots to support. But don’t prune little vegetable seedling. If you need to get your plants set out and the weather isn’t cooperating, you can arrange some artificial shade with buckets or something placed on the sunward side—but of course that shifts during the day so you either have to move the sun-blockers or use a basket or pot set over the plant. Be sure to water them well immediately after setting them out, and keep them well watered for a week or so afterward. In a hot dry period such as we have been having, it’s desirable to mulch the plants immediately too, so the area doesn’t desiccate in the sun. Mulch makes a huge difference in keeping soil cool and moist, and also blocks weeds
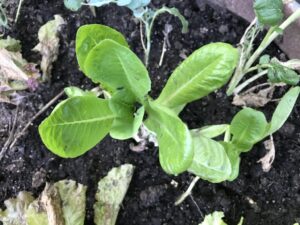
Soon your seedlings will be established and growing—and it’s on to summertime.
Read the rest: Part 1. Part 2. Part 3. Part 4. Part 5. Part 6. Part 7. Part 8. Part 9. Part 10. Part 11. Part 12. Part 13. Part 14. Part 15. Part 16. Part 17. Part 18. Part 19. Part 20. Part 21. Part 22. Part 23. Part 24. Part 25. Part 26. Part 27. Part 28. Part 29. Part 30. Part 31. Part 32. Part 33. Part 34. Part 35. Part 36. Part 37. Part 38. Part 39. Part 40. Part 41. Part 42. Part 43. Part 44. Part 45. Part 46. Part 47. Part 48. Part 49. Part 50. Part 51.